The 4-Minute Rule for Waterproofing Auckland
Table of ContentsThe Only Guide to Waterproofing AucklandThe 2-Minute Rule for Waterproofing AucklandThe Of Waterproofing AucklandThe 20-Second Trick For Waterproofing AucklandThe smart Trick of Waterproofing Auckland That Nobody is Talking About
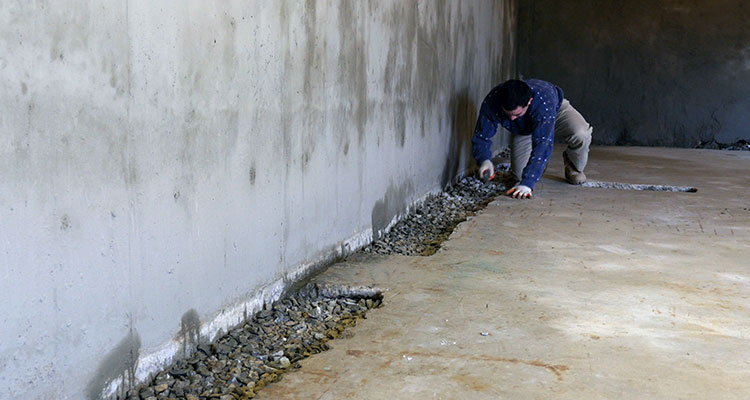
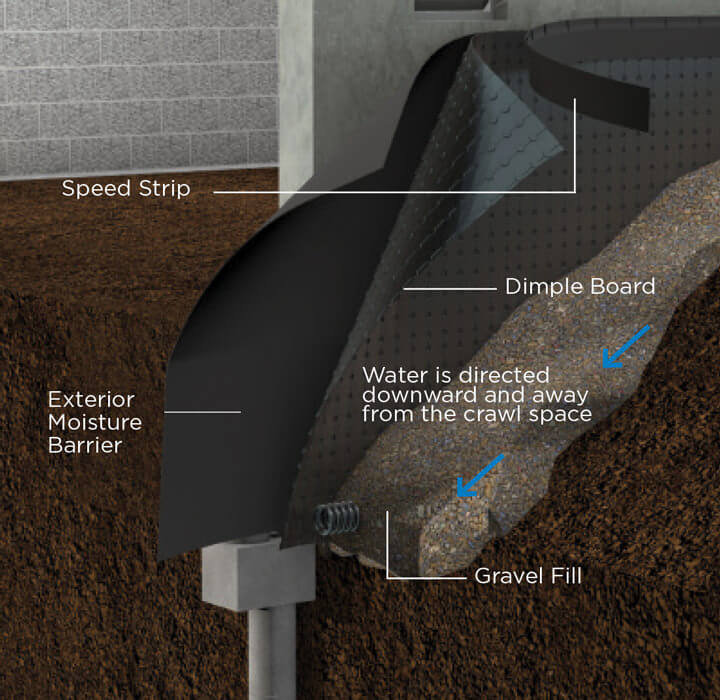
The joints of these pipelines are maintained open. The collecting chambers are not plastered from the within or outside, to receive water from the environments.The below ground water discovers the means of least resistance with the filter media. The water is accumulated in the perforated pipes via the filter media.
The procedure for the underground water tank is the very same as that of the cellar, other than for the adhering to factors. Inspect this pipeline for its tightness prior to the waterproofing work treatment.
The Best Strategy To Use For Waterproofing Auckland
If white or tinted joints are called for, then the grey cement joints are raked, and also white concrete or color concrete slurry is used with a little traverse the surface for joints of a coordinating shade. The surface is once again cleaned with sawdust. to remove excess white or shade concrete adhering to the polished china mosaic surface.
The base as well as accelerator are mixed together symmetrical by weight. This blended compound is then applied with a spatula or handheld gun tools anywhere required. Additional product is cut off with a putty blade and also a smooth vertical joint is developed. Considering that the sealant is extremely pricey, use it.
The outermost surface area of the sealer must provide a slightly scooped surface in profile. Get rid of the masking tape and also tidy the surface area with suitable solvents. For water-proofing of the straight expansion joint, plans need to begin from the R.C.C. stage of the structure. The following procedure needs to be observed. Inverted beam of lights are required to the location, for the development joint, side by side.
Socketing (pressure grouting)' is a treatment to grout the cement slurry by pressure right into the porous concrete participant. Following a sequence of the job treatment.
Getting The Waterproofing Auckland To Work
Area 20mm (3/4) metal over the chiseled section, as a filter media. Deal With 25mm (1) G.I. outlet over the metal, using rich cement mortar around the outlet and steel. Enable 24-hour for the mortar to settle and also the tight fixing of the outlet. Continue with grouting utilizing a size G.I.
5 to 2. 0m. Grouting must be performed with concrete slurry of the required thickness. For smooth flow, add 1 bag of concrete to 75 to 100 liters. If the waterproofing job procedure is refrained properly, it can present problems. Fixings as well as upkeep of waterproofing can show very frustrating for the user.
is where the optimum moved here water is used. Generally, the parent piece of the W.C. device has an I.W.C. Pan and also a concrete instance of size 0. 9m x 1. 2m x 0. 6m. This case is water-proofed after dealing with the required devices such as P-trap, C.I. item, W.C. pan, etc system can show the various points of leakages, as detailed below. The joint between the C. 1/P. V.C. piece as well as P catch. The joint in between the (tee) of external vertical stack and P.V.C./ C.I. item. The joint between the P-trap and I.W.C. pan. The joint in between the flushing pipeline and also I.W.C frying pan. All these joints should be sealed with the appropriate sealer, at the corresponding phases throughout the implementation of the work.
Examine the joint between the P-trap and L.W.C. pan from above, by inserting a hand into the trap. Inspect the joint between the flushing pipeline as well as L.W.C. frying pan by breaking only one tile, fitted specifically over the joint.
Rumored Buzz on Waterproofing Auckland
Open the "Tee' of the upright stack from the outdoors, with a ladder or zula and observe the joint of C.I. piece and also Tee' with torchlight as well as seal it effectively. If leakage still lingers, break open the hidden flushing G.I. pipeline and examine if it is watertight.
If this does not quit the leak, break open the complete system and also inspect the joint at the P-trap and also C.I./ P.V.C. pipe. Do the new waterproofing job procedure totally with utmost care. Usually, 90% of leakages quit, if we bring out the repair as specified over, in the very first 4 factors.
This can be examined by quiting the operation click reference of the wash hand basin as well as maintaining these lines entirely dry and also running them again after 4-5 days. If the leakages dry out as well as start, the resource is with these lines.
If leaks still linger, attempt socketing and grouting of cement slurry in the affected portion. Damage open the bathroom waterproofing work treatment and re-do it very carefully. An usual as well as successful approach for dealing with small leaks is to treat the afflicted portion with cement slurry. Apply the cement slurry from the leading and also allow it pass through in the splits with the top part.
See This Report about Waterproofing Auckland
Check the afflicted portion of the balcony using a wood mallet and also check if it has actually removed. Get rid of the loose section with a sculpt and also hammer. Re-do it very carefully. If the leakage is from the edges or from the parapet wall, then load all the fractures after damaging it open with cement.
Some chemicals are suggested for mixing with cement, at the time of concreting. The traditional technique of brickbat coba is still one of the most popular of water-proofing technique in India. Waterproofing substances are typically readily available in powder and liquid kind, as they offer the dual function of waterproofing job procedure as well as warmth protecting.
Make certain that the socketing is done before the skim coat job. Make certain that there is no leakage from the bath W.C. piece once the socketing is this article done. Make certain that the traps and also release pipes are taken care of correctly prior to the brickbat coba layer. Make sure that all the brickbats are well-soaked in water, prior to use.
Preserve a correct gap between the brickbats. Inspect the slope of the brickbat coat, in the direction of the trap. Guarantee that the water-proofing substance is blended in the mortar, for every single stage of work. The topcoat must be executed in one stroke, with no joints. Make certain correct finishing near traps and spouts.